Open this area in the app Sign in to your workspace if prompted.
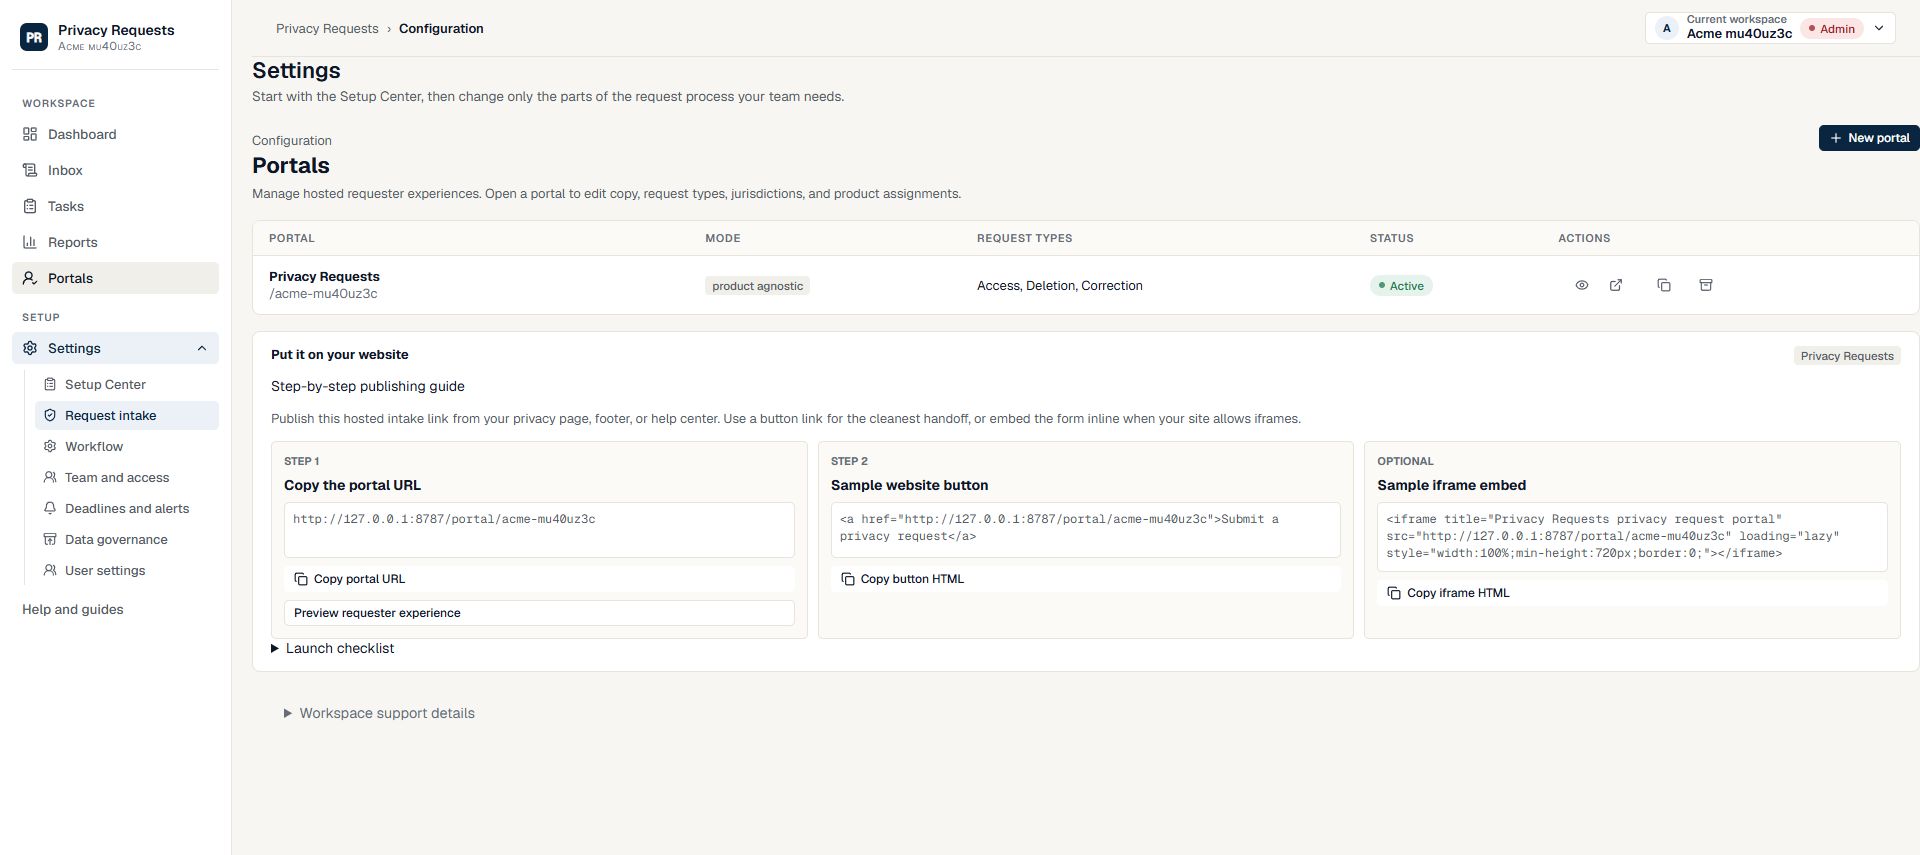
Review the requester experience
Open Portals, select the active portal, and review its branding, contact information, and accepted request types. Open the requester link to see what a visitor sees.
- Check the company name and privacy contact.
- Make sure request types match your team’s process.
- Choose who monitors new requests and who covers absences.
Publish a normal link
In Portals, find Put it on your website and copy the portal URL. In your website editor, add a text link labeled ‘Make a privacy request’ and paste that URL as the destination.
- For a footer: edit the footer/navigation area, add the link, and publish.
- For a help center: add the link to your privacy or account-data article.
- A standard link works without HTML access. Use the button or iframe snippet only if your editor supports it.
Embed the form in an existing page
Open the portal’s settings and add your allowed website addresses, one per line, such as https://www.example.com. Use complete HTTPS addresses without a page path. Save, then return to Portals, choose the portal to publish, and copy its iframe HTML into your website’s HTML block.
- Embedding is off by default. List only websites you trust, and add www and non-www addresses separately when needed. Wildcards are not supported.
- The optional script adjusts the form height. Your website may need to permit the app domain in its frame and script policy. If scripts are blocked, the form uses a scrollable frame.
- Keep the Open form in a new tab link as a fallback. Request status opens separately to protect the requester’s private case information.
- Test on the published website: some editors wrap their preview in another frame that is not on your allowed list. Removing an address blocks future embedded loads from that website.
Run the launch check
Visit the published website as a visitor, follow the link, and check the portal on a phone-sized screen. Use Setup Center’s test-request action to verify that a submission reaches Inbox.
- Use fictional request details and an email inbox you control.
- Confirm receipt and the assigned owner in the workspace.
- Arrange reviewer access and follow the first-request playbook before handling real disclosures.
Need more help?
Product support is available at support@privacyrequests.co. Requesters should contact the company handling the request first because that company controls the case record and response decisions.